- NativeScript 教程
- NativeScript - 主页
- NativeScript - 简介
- NativeScript - 安装
- NativeScript - 架构
- NativeScript - 角度应用程序
- NativeScript - 模板
- NativeScript - 小部件
- NativeScript - 布局容器
- NativeScript - 导航
- NativeScript - 事件处理
- NativeScript - 数据绑定
- NativeScript - 模块
- NativeScript - 插件
- NativeScript - 使用 JavaScript 的本机 API
- NativeScript - 在 Android 中创建应用程序
- NativeScript - 在 iOS 中创建应用程序
- NativeScript - 测试
- NativeScript 有用资源
- NativeScript - 快速指南
- NativeScript - 有用的资源
- NativeScript - 讨论
NativeScript - 角度应用程序
让我们创建一个简单的基本应用程序来了解 NativeScript 应用程序的工作流程。
创建应用程序
让我们学习如何使用 NativeScript CLI、tns 创建简单的应用程序。tns 提供了一个命令 create 用于在 NativeScript 中创建新项目。
创建新应用程序的基本语法如下 -
tns create <projectname> --template <template_name>
在哪里,
项目名称是项目的名称。
template_name是项目模板。NativeScript提供了大量的启动模板来创建不同类型的应用程序。使用基于 Angular 的模板。
让我们创建一个名为 NativeScriptSamples 的新目录来处理我们的新应用程序。现在,打开一个新终端,然后移动到我们的目录并输入以下命令 -
tns create BlankNgApp --template tns-template-blank-ng
其中,tns-template-blank-ng指的是基于 AngularJS 的空白移动应用程序。
输出
.....
.....
.....
Project BlankNgApp was successfully created.
Now you can navigate to your project with $ cd BlankNgApp
After that you can preview it on device by executing $ tns preview
现在,我们的第一个移动应用程序BlankNgApp已创建。
应用程序的结构
让我们通过分析本章中的第一个应用程序 BlankNgApp 来了解 NativeScript 应用程序的结构。NativeScript 应用程序分为多个部分,如下所示 -
配置部分
节点模块
安卓源
iOS 源
应用程序源代码
应用程序的一般结构如下 -
│ angular.json
│ LICENSE
│ nsconfig.json
│ package-lock.json
│ package.json
│ tsconfig.json
│ tsconfig.tns.json
│ tsfmt.json
│ webpack.config.js
│
├───App_Resources
│  ├───Android
│  │
│  └───iOS
│
├───hooks
│
├───node_modules
|
└───src
   │ app.css
   │ main.ts
   │ package.json
   │
   └───app
      │  app-routing.module.ts
      │  app.component.html
      │  app.component.ts
      │  app.module.ts
      │
      └───home
         home-routing.module.ts
         home.component.html
         home.component.ts
         home.module.ts
让我们了解应用程序的每个部分以及它如何帮助我们创建应用程序。
配置部分
应用程序根目录中的所有文件都是配置文件。配置文件的格式为JSON格式,可以帮助开发者轻松了解配置细节。NativeScript 应用程序依赖这些文件来获取所有可用的配置信息。让我们浏览一下本节中的所有配置文件。
包.json
package.json 文件设置应用程序的身份 (id) 以及应用程序正常工作所依赖的所有模块。下面是我们的 package.json -
{
   "nativescript": {
      "id": "org.nativescript.BlankNgApp",
      "tns-android": {
         "version": "6.3.1"
      }, "tns-ios": {
         "version": "6.3.0"
      }
   }, "description": "NativeScript Application",
   "license": "SEE LICENSE IN <your-license-filename>",
   "repository": "<fill-your-repository-here>",
   "dependencies": {
      "@angular/animations": "~8.2.0",
      "@angular/common": "~8.2.0",
      "@angular/compiler": "~8.2.0",
      "@angular/core": "~8.2.0",
      "@angular/forms": "~8.2.0",
      "@angular/platform-browser": "~8.2.0",
      "@angular/platform-browser-dynamic": "~8.2.0",
      "@angular/router": "~8.2.0",
      "@nativescript/theme": "~2.2.1",
      "nativescript-angular": "~8.20.3",
      "reflect-metadata": "~0.1.12",
      "rxjs": "^6.4.0",
      "tns-core-modules": "~6.3.0",
      "zone.js": "~0.9.1"
   },
   "devDependencies": {
      "@angular/compiler-cli": "~8.2.0",
      "@ngtools/webpack": "~8.2.0",
      "nativescript-dev-webpack": "~1.4.0",
      "typescript": "~3.5.3"
   },
   "gitHead": "fa98f785df3fba482e5e2a0c76f4be1fa6dc7a14",
   "readme": "NativeScript Application"
}
这里,
应用程序的身份 (nativescript/id) - 将应用程序的 id 设置为 org.nativescript.BlankNgApp。此 ID 用于将我们的应用程序发布到 Play Store 或 iTunes。该 ID 将是我们的应用程序标识符或包名称。
依赖项(dependency) - 指定我们所有依赖的节点模块。由于默认的 NativeScript 实现依赖于 Angular 框架,因此包含了 Angular 模块。
开发依赖项- 指定应用程序依赖的所有工具。由于我们正在使用 TypeScript 开发应用程序,因此它包含 TypeScript 作为依赖模块之一。
angular.json - Angular 框架配置信息。
nsconfig.json - NativeScript 框架配置信息。
tsconfig.json、tsfmt.json & tsconfig.tns.json - TypeScript 语言配置信息
webpack.config.js - 用 JavaScript 编写的 WebPack 配置。
节点模块
由于 NativeScript 项目是基于节点的项目,因此它将所有依赖项存储在 node_modules 文件夹中。我们可以使用 npm (npm install) 或 tns 下载所有应用程序依赖项并将其安装到 node_moduels 中。
安卓源代码
NativeScript 自动生成 android 源代码并将其放置在 App_Resources\Android 文件夹中。它将用于使用Android SDK创建 Android 应用程序
iOS 源代码
NativeScript 自动生成 iOS 源代码并将其放置在 App_Resources\iOS 文件夹中。它将用于使用 iOS SDK 和 XCode 创建 iOS 应用程序
应用程序源代码
实际的应用程序代码放置在 src 文件夹中。我们的应用程序在 src 文件夹中有以下文件。
└───src
   │ app.css
   │ main.ts
   │ package.json
   │
   └───app
   │ app-routing.module.ts
   │ app.component.html
   │ app.component.ts
   │ app.module.ts
   │
   └───home
         home-routing.module.ts
         home.component.html
         home.component.ts
         home.module.ts
让我们了解本节中所有文件的用途以及它们的组织方式 -
步骤1
main.ts - 应用程序的入口点。
// this import should be first in order to load some required settings (like globals and reflect-metadata)
import { platformNativeScriptDynamic } from "nativescript-angular/platform";
import { AppModule } from "./app/app.module";
platformNativeScriptDynamic().bootstrapModule(AppModule);
在这里,我们将 AppModule 设置为应用程序的引导模块。
第2步
app.css - 应用程序的主要样式表如下所示 -
@import "~@nativescript/theme/css/core.css";
@import "~@nativescript/theme/css/brown.css";
/* Place any CSS rules you want to apply on both iOS and Android here.
This is where the vast majority of your CSS code goes. */
这里,
app.css 导入 NativeScript 框架的核心样式表和棕色主题样式表。
步骤3
app\app.module.ts - 应用程序的根模块。
import { NgModule, NO_ERRORS_SCHEMA } from "@angular/core";
import { NativeScriptModule } from "nativescript-angular/nativescript.module";
import { AppRoutingModule } from "./app-routing.module";
import { AppComponent } from "./app.component";
@NgModule(
   {
      bootstrap: [
         AppComponent
      ],
      imports: [
         NativeScriptModule,
         AppRoutingModule
      ],
      declarations: [
         AppComponent
      ], schemas: [
         NO_ERRORS_SCHEMA
      ]
   }
)
export class AppModule { }
这里,
AppModule是基于NgModule创建的,设置应用程序的组件和模块。它导入两个模块 NativeScriptModule 和 AppRoutingModule 以及一个组件 AppComponent。它还将 AppComponent 设置为应用程序的根组件。
步骤4
app.component.ts - 应用程序的根组件。
import { Component } from "@angular/core";
@Component(
   {
      selector: "ns-app",
      templateUrl: "app.component.html"
   }
)
export class AppComponent { }
这里,
AppComponent 设置组件的模板和样式表。模板是使用 NativeScript UI 组件以简单的 HMTL 设计的。
步骤5
app-routing.module.ts - AppModule 的路由模块
import { NgModule } from "@angular/core";
import { Routes } from "@angular/router";
import { NativeScriptRouterModule } from "nativescript-angular/router";
const routes: Routes = [
   { path: "", redirectTo: "/home", pathMatch: "full" },
   { path: "home", loadChildren: () =>
   import("~/app/home/home.module").then((m) => m.HomeModule) }
];
@NgModule(
   {
      imports: [NativeScriptRouterModule.forRoot(routes)],
      exports: [NativeScriptRouterModule]
   }
)
export class AppRoutingModule { }
这里,
AppRoutingModule 使用 NativeScriptRouterModule 并设置 AppModule 的路由。它基本上将空路径重定向到 /home 并将 /home 指向 HomeModule。
步骤6
app\home\home.module.ts - 定义一个新模块 HomeModule。
import { NgModule, NO_ERRORS_SCHEMA } from "@angular/core";
import { NativeScriptCommonModule } from "nativescript-angular/common";
import { HomeRoutingModule } from "./home-routing.module";
import { HomeComponent } from "./home.component";
@NgModule(
   {
      imports: [
         NativeScriptCommonModule,
         HomeRoutingModule
      ],
      declarations: [
         HomeComponent
      ],
      schemas: [
         NO_ERRORS_SCHEMA
      ]
   }
)
export class HomeModule { }
这里,
HomeModule 导入两个模块 HomeRoutingModule 和 NativeScriptCommonModule 以及一个组件 HomeComponent
步骤7
app\home\home.component.ts - 定义 Home 组件并用作应用程序的主页。
import { Component, OnInit } from "@angular/core";
@Component(
   {
      selector: "Home", templateUrl: "./home.component.html"
   }
)
export class HomeComponent implements OnInit {
   constructor() {
      // Use the component constructor to inject providers.
   }
   ngOnInit(): void {
      // Init your component properties here.
   }
}
这里,
HomeComponent 设置 home 组件的模板和选择器。
步骤8
app\home\home-routing.module.ts - HomeModule 的路由模块,用于定义 home 模块的路由。
import { NgModule } from "@angular/core";
import { Routes } from "@angular/router";
import { NativeScriptRouterModule } from "nativescript-angular/router";
import { HomeComponent } from "./home.component";
const routes: Routes = [
   { path: "", component: HomeComponent }
];
@NgModule(
   {
      imports: [NativeScriptRouterModule.forChild(routes)],
      exports: [NativeScriptRouterModule]
   }
)
export class HomeRoutingModule { }
这里,
HomeRoutingModule 将空路径设置为 HomeComponent。
步骤9
app.component.html 和 home.component.html - 它们用于使用 NativeScript UI 组件设计应用程序的 UI。
运行您的应用程序
如果您想在不使用任何设备的情况下运行您的应用程序,请输入以下命令 -
tns preview
执行此命令后,将生成二维码以扫描并连接您的设备。
输出
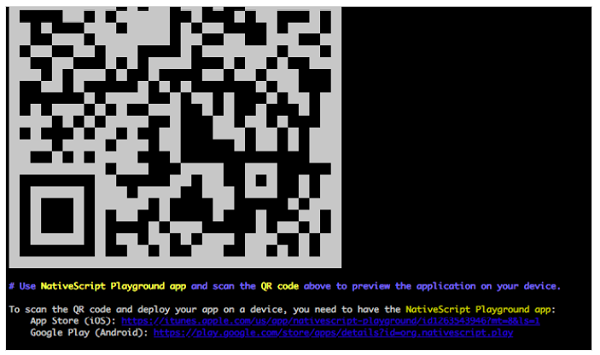
二维码
现在二维码已生成,并在下一步中连接到 PlayGround。
NativeScript PlayGround
在 iOS 或 Android 手机上打开 NativeScript PlayGround 应用程序,然后选择扫描二维码选项。它将打开相机。聚焦控制台显示的二维码。这将扫描 QR 码。扫描二维码将触发应用程序构建,然后将应用程序同步到设备,如下所示 -
Copying template files...
Platform android successfully added. v6.3.1
Preparing project...
File change detected. Starting incremental webpack compilation...
webpack is watching the files…
Hash: 1f38aaf6fcda4e082b88
Version: webpack 4.27.1
Time: 9333ms
Built at: 01/04/2020 4:22:31 PM
               Asset          Size        Chunks         Chunk Names
               0.js           8.32 KiB     0     [emitted]
          bundle.js           22.9 KiB    bundle [emitted] bundle
       package.json          112 bytes           [emitted]
         runtime.js             73 KiB   runtime [emitted] runtime
tns-java-classes.js            0 bytes  [emitted]
          vendor.js            345 KiB   vendor  [emitted] vendor
Entrypoint bundle = runtime.js vendor.js bundle.js
[../$$_lazy_route_resource lazy recursive] ../$$_lazy_route_resource lazy
namespace object 160 bytes {bundle} [built] [./app.css] 1.18 KiB {bundle} [built] [./app/app-routing.module.ts] 688 bytes {bundle} [built]
[./app/app.component.html] 62 bytes {bundle} [built]
[./app/app.component.ts] 354 bytes {bundle} [built]
[./app/app.module.ts] 3.22 KiB {bundle} [built]
[./app/home/home.module.ts] 710 bytes {0} [built]
[./main.ts] 1.84 KiB {bundle} [built]
[@angular/core] external "@angular/core" 42 bytes {bundle} [built] [nativescript-angular/nativescript.module] external "nativescript-
angular/nativescript.module" 42 bytes {bundle} [built]
[nativescript-angular/platform] external "nativescript-angular/platform" 42
bytes {bundle} [built] [tns-core-modules/application] external "tns-core-
modules/application" 42 bytes {bundle} [built]
[tns-core-modules/bundle-entry-points] external "tns-core-modules/bundle-entry-points" 42
bytes {bundle} [built]
[tns-core-modules/ui/frame] external "tns-core-
modules/ui/frame" 42 bytes {bundle} [built]
[tns-core-modules/ui/frame/activity] external "tns-core-
modules/ui/frame/activity" 42 bytes {bundle} [built]
   + 15 hidden modules Webpack compilation complete. Watching for file changes.
Webpack build done!
Project successfully prepared (android)
Start sending initial files for device Bala Honor Holly (ff5e8622-7a01-4f9c-
b02f-3dc6d4ee0e1f).
Successfully sent initial files for device Bala Honor Holly (ff5e8622-7a01-4f9c-b02f-3dc6d4ee0e1f).
LOG from device Bala Honor Holly: HMR: Hot Module Replacement Enabled. Waiting for signal.
LOG from device Bala Honor Holly: Angular is running in the development mode.
Call enableProdMode() to enable the production mode.
输出
扫描后,您应该在设备上看到 BlankNgApp。如下所示 -
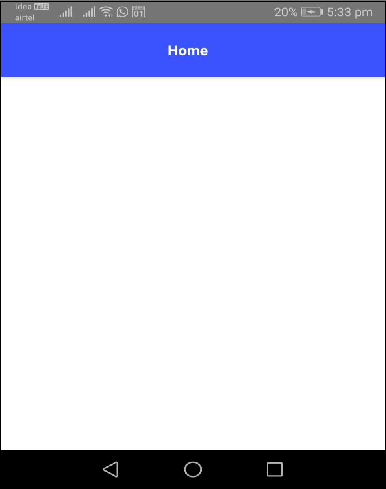
在设备上运行您的应用程序
如果您想在应用程序中测试连接的设备,您可以使用以下语法进行验证 -
'tns device <Platform> --available-devices'
之后,您可以使用以下命令执行您的应用程序 -
tns run
上述命令用于在本地构建应用程序并安装在 Andriod 或 iOS 设备上。如果您想在 Android 模拟器上运行您的应用程序,请输入以下命令 -
tns run android
对于 iOS 设备,您可以按照以下命令操作 -
tns run ios
这将在 Android/iOS 设备中初始化应用程序。我们将在接下来的章节中更详细地讨论这个问题。
实时同步
NativeScript 提供将应用程序中的更改实时同步到预览应用程序的功能。让我们使用您最喜欢的任何编辑器打开该项目(Visual Studio Code 将是更好可视化的理想选择)。让我们在代码中添加一些更改,看看 LiveSync 中如何检测到这些更改。
现在打开文件 app.css,它将包含以下内容 -
@import "~@nativescript/theme/css/core.css";
@import "~@nativescript/theme/css/blue.css";
/* Place any CSS rules you want to apply on both iOS and Android here.
This is where the vast majority of your CSS code goes. */
在这里,导入语句告诉我们应用程序的配色方案。让我们将蓝色配色方案更改为棕色配色方案,如下所示 -
@import "~@nativescript/theme/css/core.css";
@import "~@nativescript/theme/css/brown.css";
/* Place any CSS rules you want to apply on both iOS and Android here.
This is where the vast majority of your CSS code goes. */
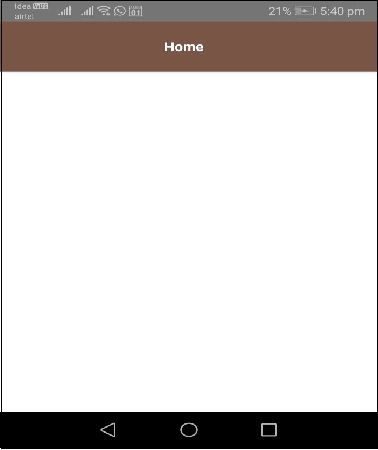
我们设备中的应用程序刷新,您应该看到一个棕色的 ActionBar,如下所示 -
输出
以下是 BlankNgApp 主页 - 棕色主题。