- ASP.NET WP 教程
- ASP.NET WP - 主页
- ASP.NET WP - 概述
- ASP.NET WP - 环境设置
- ASP.NET WP - 入门
- ASP.NET WP - 视图引擎
- 项目文件夹结构
- ASP.NET WP - 全局页面
- ASP.NET WP - 编程概念
- ASP.NET WP - 布局
- ASP.NET WP - 使用表单
- ASP.NET WP - 页面对象模型
- ASP.NET WP - 数据库
- ASP.NET WP - 将数据添加到数据库
- ASP.NET WP - 编辑数据库数据
- ASP.NET WP - 删除数据库数据
- ASP.NET WP - WebGrid
- ASP.NET WP - 图表
- ASP.NET WP - 处理文件
- ASP.NET WP - 处理图像
- ASP.NET WP - 处理视频
- ASP.NET WP - 添加电子邮件
- ASP.NET WP - 添加搜索
- 将社交网络添加到网站
- ASP.NET WP - 缓存
- ASP.NET WP - 安全
- ASP.NET WP - 发布
- ASP.NET WP 有用资源
- ASP.NET WP - 快速指南
- ASP.NET WP - 有用的资源
- ASP.NET WP - 讨论
ASP.NET WP - 添加电子邮件
在本章中,我们将介绍如何向网站添加电子邮件以及如何从网页发送电子邮件。您需要从网站发送电子邮件的原因可能有很多。
您可以向用户发送确认消息。
您还可以向自己发送通知。例如,当新用户在网站上注册时。
使用WebMail 帮助程序发送电子邮件非常容易。要使用此 WebMail 帮助程序,您必须有权访问 SMTP(SMTP 代表简单邮件传输协议)服务器。
SMTP 服务器是仅将邮件转发到收件人服务器的电子邮件服务器。
如果您的网站使用托管提供商,那么他们会设置您的电子邮件,并且可以告诉您 SMTP 服务器名称。
如果您在公司网络内工作,管理员或您的 IT 部门通常可以为您提供有关您可以使用的 SMTP 服务器的信息。
如果您在家工作,您甚至可以使用普通电子邮件提供商进行测试,他们可以告诉您他们的 SMTP 服务器的名称。
要使用 SMTP 服务器,您需要以下内容:
SMTP 服务器的名称。
端口号大多为 25。但是,您的 ISP 可能会要求您使用端口 587。
用户名、密码等凭据。
让我们看一个简单的示例,我们将在其中发送电子邮件。首先,我们需要创建一个新的 CSHTML 文件。
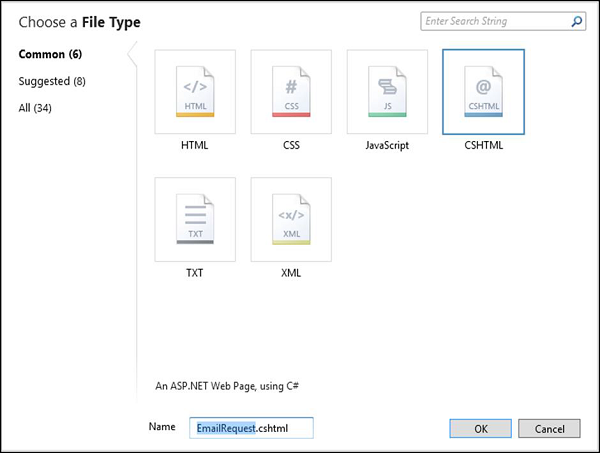
在“名称”字段中输入EmailRequest.cshtml ,然后单击“确定”。
现在替换 EmailRequest.cshtml 文件中的以下代码。
<!DOCTYPE html>
<html>

   <head>
      <title>Request for Assistance</title>
   </head>

   <body>
      <h2>Submit Email Request for Assistance</h2>
      <form method = "post" action = "ProcessRequest.cshtml">
         <div>
            Your name:
            <input type = "text" name = "customerName" />
         </div>

         <div>
            Your email address:
            <input type = "text" name = "customerEmail" />
         </div>

         <div>
            Details about your problem: <br />
            <textarea name = "customerRequest" cols = "45" rows = "4"></textarea>
         </div>

         <div>
            <input type = "submit" value = "Submit" />
         </div>
      </form>

   </body>
</html>
正如您在上面的代码中看到的,表单的 action 属性设置为ProcessRequest.cshtml,这意味着表单将被提交到该页面。因此,让我们创建另一个 CSHTML 文件 ProcessRequest.cshtml 并替换以下代码。
@{
   var customerName = Request["customerName"];
   var customerEmail = Request["customerEmail"];
   var customerRequest = Request["customerRequest"];
   var errorMessage = "";
   var debuggingFlag = false;

   try {
      // Initialize WebMail helper
      WebMail.SmtpServer = "smtp.mail.yahoo.com";
      WebMail.SmtpPort = 465;
      WebMail.UserName = "waqasm78@yahoo.com";
      WebMail.Password = "**********";
      WebMail.From = "waqasm78@yahoo.com";

      // Send email
      WebMail.Send(to: customerEmail,
         subject: "Help request from - " + customerName,
         body: customerRequest
      );
   }catch (Exception ex ) {
      errorMessage = ex.Message;
   }
}

<!DOCTYPE html>
<html>

   <head>
      <title>Request for Assistance</title>
   </head>

   <body>
      <p>Sorry to hear that you are having trouble, <b>@customerName</b>.</p>

      @if(errorMessage == ""){
         <p>An email message has been sent to our customer service department regarding
            the following problem:</p>
         <p><b>@customerRequest</b></p>
      } else{
         <p><b>The email was <em>not</em> sent.</b></p>
         <p>Please check that the code in the ProcessRequest page has
            correct settings for the SMTP server name, a user name,
            a password, and a "from" address.</p>

         if(debuggingFlag){
            <p>The following error was reported:</p>
            <p><em>@errorMessage</em></p>
         }
      }

   </body>
</html>
如果您使用雅虎电子邮件提供商,则必须替换上述程序中的以下代码才能使其运行。
// Initialize WebMail helper
   WebMail.SmtpServer = "smtp.mail.yahoo.com";
   WebMail.SmtpPort = 465;
   WebMail.UserName = "waqasm78@yahoo.com";
   WebMail.Password = "**********";
   WebMail.From = "waqasm78@yahoo.com";
您需要在WebMail.Password属性中键入您自己的密码。
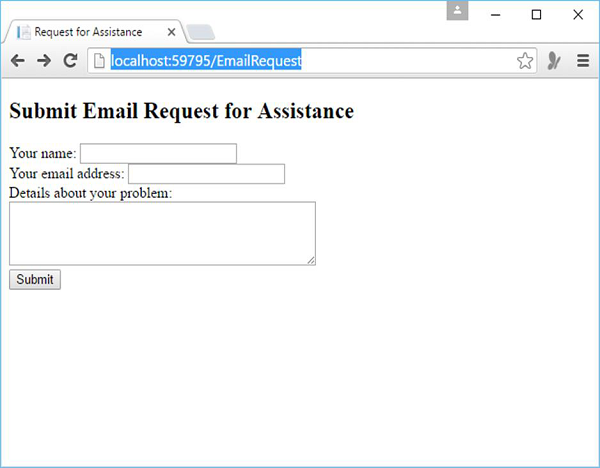
现在让我们运行应用程序并指定以下 url - http://localhost:59795/EmailRequest,您将看到以下网页。
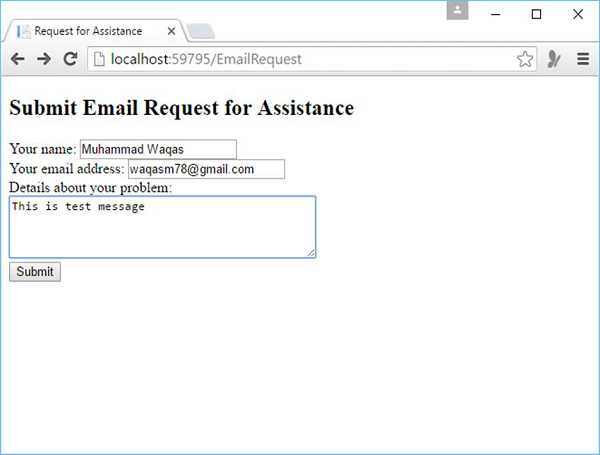
现在在所有提到的字段中输入一些信息,如以下屏幕截图所示。
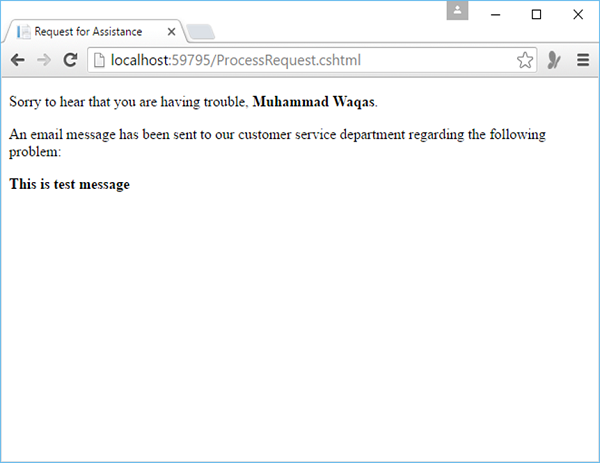
点击提交,邮件发送成功后您将看到以下消息。