- Python Pillow教程
- 蟒蛇Pillow - 主页
- Python Pillow - 概述
- Python Pillow - 环境设置
- Python Pillow - 使用图像模块
- Python Pillow - 处理图像
- Python Pillow - 创建缩略图
- Python Pillow - 合并图像
- Python Pillow - 模糊图像
- Python Pillow - 裁剪图像
- Python Pillow - 翻转和旋转图像
- Python Pillow - 调整图像大小
- Python Pillow - 创建水印
- Python Pillow - 向图像添加滤镜
- Python Pillow - 图像上的颜色
- Python Pillow - ImageDraw 模块
- Python Pillow - 图像序列
- Python Pillow - 在图像上写入文本
- Python Pillow - 使用 Numpy 进行机器学习
- Python Pillow 有用资源
- Python Pillow - 快速指南
- Python Pillow - 有用的资源
- Python Pillow - 讨论
Python Pillow - 创建水印
您已经注意到,一些在线照片带有水印。水印绝对是保护图像免遭滥用的更好方法之一。此外,建议在将创意照片分享到社交媒体之前为它们添加水印,以防止被滥用。
水印通常是覆盖在照片上的一些文本或徽标,用于标识照片的拍摄者或照片的所有者。
Pillow包允许我们为您的图像添加水印。为了向图像添加水印,我们需要Pillow 包中的“Image”、“ImageDraw”和“ImageFont”模块。
“ImageDraw”模块添加了在新图像或现有图像上绘制 2D 图形的功能。“ImageFont”模块用于加载位图、TrueType 和 OpenType 字体文件。
例子
以下Python程序演示了如何使用Python Pillow向图像添加水印 -
#Import required Image library
from PIL import Image, ImageDraw, ImageFont

#Create an Image Object from an Image
im = Image.open('images/boy.jpg')
width, height = im.size

draw = ImageDraw.Draw(im)
text = "sample watermark"

font = ImageFont.truetype('arial.ttf', 36)
textwidth, textheight = draw.textsize(text, font)

# calculate the x,y coordinates of the text
margin = 10
x = width - textwidth - margin
y = height - textheight - margin

# draw watermark in the bottom right corner
draw.text((x, y), text, font=font)
im.show()

#Save watermarked image
im.save('images/watermark.jpg')
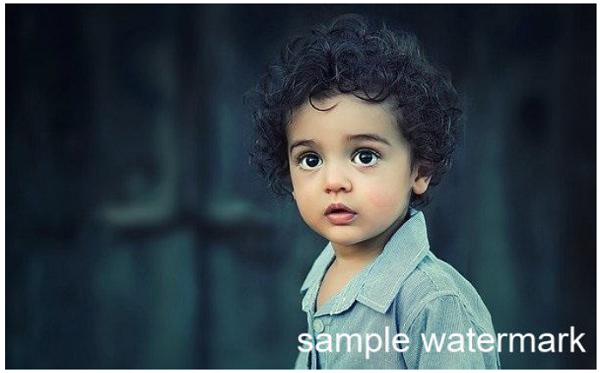
输出
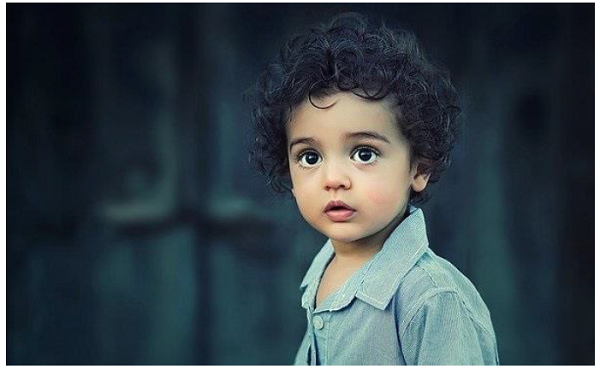
假设以下是位于 image 文件夹中的输入图像boy.jpg 。
执行上述程序后,如果观察输出文件夹,您可以看到生成的带有水印的 watermark.jpg 文件,如下所示 -